Saturday, March 23, 2013

big, bright, natural eyes.


Hi ladies!

As you all should know having bright-awake eyes is one of the task that most women have to do especially for day time looks. I find that having big, bright eyes can be an easy task to do every morning before I leave the house looking like a tired panda (all those late nights with coffee and bags of tea). All you need are these four items in your make up routine and you're set to go out, looking and sometimes pretending that you are wide-awake for whatever meeting or commitments you have to attend to (especially those 6am work routines)!


Natural Eyes

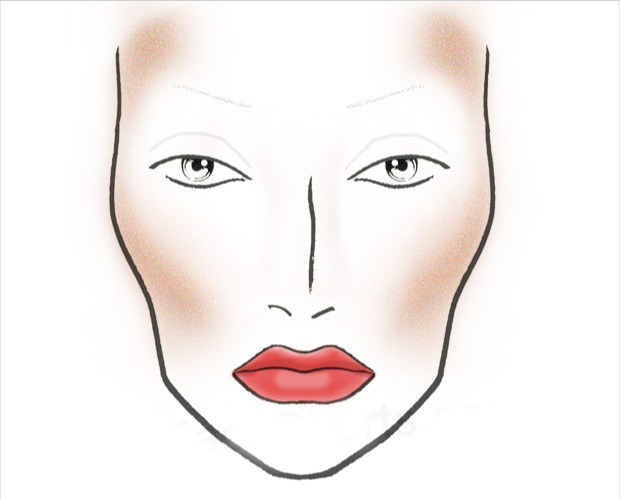
Natural Eyes by nina-yap featuring matte finish makeup

1. My trusty eyeliner. 
Currently I'm using a crayon waterproof black eyeliner from Revlon. I love tight-lining my eyes to make my lashes look fuller. Tight-lining is the easiest task and I usually do it first as sometimes I run out of time to play with my eye-shadows. 

All you need to do is just use a Q-tip or cotton bud and lift your eyes where you can see beneath your eyelids. Start shading in around the top tip of your eyelids (where it's usually white). Don't shade in overly dark as I find that to look a bit more smoky eyes than a big bright eye. 

I usually use cotton bud or sometimes my pinky finger to pull my eyelids lightly on the top as by tugging on your eyelids too much, it will start to sag! I'm sure most of you do not want to experience saggy, wrinkly eyelids at an early age! 

Tip: For transition to night time, you can always tight-line on the bottom outer corners of your eyelid and smudge away! 

2. Matte eyeshadows (pssst... on lazy days, I skip this!)
When I feel up for it, I usually apply a light brown-cashew colour (Matt Gallagher from TheBalm) eyeshadow on my top lid and just smooth it over (shaping it like an almond on my eyelids). This usually takes me about 30seconds to 1 minute to smooth it out on both sides. 

Then, I will use a smudge brush or my pinky finger and tap a bit of dark brown colour (Matt Ramirez from the Balm) or if I feel adventurous a navy blue (Matt Horowitz) or purple (Matt Batali) at where your crease is and blend blend blend! 

Finally, using a lighter beige (Matt Smith) or baby pink (Matt Chung) in the inner corners of my eyes. 

Tip: Remember to have a handy makeup remover wipe and a tissue nearby to clean your finger tips if you have to reuse them! I do find finger tip application has more control. However, my smudge brush from NARS is always my go-to to tap tap before blend blend (if that makes sense!).

3. Eyelash curler. 
I do have three eyelash curlers currently that I alternate (but my favourite is still the Anna Sui one): Natio, Anna Sui, Missha. I am eyeing on getting the infamous Shu Uemura or Shiseido eyelash curlers too. 

Eyelash curlers are usually great for any types of eyes. Unless you have naturally curly eyelashes, then it's easier to use an eyelash curlers then relying upon the likes of a curling mascara (which I personally do not believe in). 

4. Mascara. 
Currently I'm using Clinique's High Impact Dramatic Mascara and Lash Power in black. They're perfect formulas for people with super sensitive eyes and do not want to be tugging on their eyelashes when removing make up. Clinique's mascara are easily removable (except that new waterproof one) and I tend to use makeup wipes to remove them. 

I love love love coats and coats of mascara as long as they're not heavy on my lids and drooooooop them down so low that my eyes cannot see the light of the day. Also, despite knowing that I shouldn't be doing this but I do curl my eyelashes after I apply mascara.

Yes, it is sticky when I try curling them again and yes, sometimes eyelashes do feel the pain but who doesn't want awesome curly lashes? 

Tip: Hence, a make up artist friend of mine advised me to firstly, warm up the eyelash mascara with your awesome hair dryer. Curl your lashes a few times (slowly making your way up on your lashes). Then, apply three coats of mascara and it should not droop! 


That's about it with my daily eye make up to perk up that lazy eyes of mine! What about your natural beautifying routine for your eyes? Do you apply coats of mascara too? x 


contour-tionist.


How to Bronze

How to Bronze by nina-yap featuring stila


Hi ladies! (do you like my title? haha i'm so lame)

Today I'm just going to briefly talk about contouring that lovely face of yours with bronzers, highlighters or illuminators. Disclaimer: this is according to how I found is the best way to contour. 

Firstly, after my primer base and foundation, I will lightly either use a fluffy powder brush and brush translucent powder (currently using: Jurlique's Citrus Powder) or you can always use a brush to apply your skin-tone powder all over. 

However, you must keep in mind what skin type you have. I would advise for combination dry-oily to pat a light powder over. For dry skin, you might want a dewy finish whereby you can skip the powder step. If you prefer a matte finish, you can try a natural finish foundation and for a long lasting effect, powder on! 

Tip: I find that translucent powder is much better as I usually aim for a bare, natural look rather than look too jam-packed with make up. Either that or I will only use a skin-toned powder all over (tip inside a tip: try to choose a shade darker but not too dark to look more natural). 

Secondly, I would definitely use my trusty Touche Eclat from Yves Saint Laurent. Or on days where my eye bags are calling for help I will use Lancome's Teint Miracle or Garnier's Anti-dark circle for eyes. 

From my understanding and discussion with ex-colleagues, Touche Eclat is meant to be a highlighter or illuminator. Do not use it for concealing effects (as it has been misunderstood all along) ...

Touche Eclat application. 
For dark circles concealment, I usually click once on my Teint Miracle and dot it around my eye bags and use my fourth finger to smooth it over. 

For redness around my nose area (which I tend to get), I would recommend Clinique's Redness Solution Daily Protector with SPF15. It comes out as a green liquid and as we know, green helps counteract the redness. 

Thirdly, bronzing time! Currently I'm using Benefit's Sugabomb and loving it so far! It's about to run out since I use it for both blush and bronzer depending on my moodswings. Sometimes I use more bronzers from Stila or Estee Lauder to enhance my features. 

So where do I brush my bronzers? 

Closest picture I could find + Bronzer along Jawbone.

I must admit, it was very difficult to find a proper picture for this. However, that's the closest picture I could find. (Will try uploading a video of myself doing it sometime!) 

For me, I follow the NUMBER THREE RULE (hence I put bronzers as my third step, get it?) What does this mean? 

It means I start from the sides of my forehead and brush it over to below my cheekbones (definitely below your cheekbones as you need to highlight it, not colour on it - it's called bronzer, not a colourerererer if that makes sense). Then, I usually move onto alongside my jawbone (especially jawbones if you want to have a sharper edged face). I find that I have a bit of chubbiness on my jawbone, so I usually intensify my bronzing powder there (but not too much!) 

Repeat on both sides: SIDES OF FOREHEAD - BELOW CHEEKBONES - JAWBONE. 

And you will find that you're drawing a number three on both sides of your face! :) 

Till next time, leave a comment below on how you defy natural beauty by contouring! :) x 


Friday, March 22, 2013

rose baroque.

my lipstick is redder than your lipstick.

Hi ladies! Who wants to defy natural beauty?

This is my first beauty post and I wanted to make a statement. So, what's the biggest statement in beauty history? Sexy, bold, (slightly slutty at times aka +tonnes of smoky eyes +crazy fake eyelashes +pushyupbras) ...

RED LIPS

Credits: Shiseido Australia

My first red lipstick is from Nars: Velvet Matte in Pop life. It's a mixture of red and orange base. Then I started loving red lipsticks especially the various Nars, including Red Square and Dragon Girl.

How do I wear it? 
1. Dewy foundation base: most likely my trusty BB Cream in natural (not the super-pale-ones!)
2. Natural brows: straight-thick shaped brows (enhanced with Natio eyebrow set)
3. Tightlined eyes: using a black waterproof crayon eyeliner (opthamologist tested for me cause  I wear contacts), just lift your eyes a bit using a Q-tip or just a cotton bud and draw in a fine black line. This will thicken your lashes aka lie about how much lashes you have.
4. And oh hi there, Red lipstick. To keep it from feathering, lined the outer lips with red or neutral lipliner. To keep it from getting too matte, use some moisturising lip balms (Chubby stick is my go-to-balm!)

What I would usually recommend? 
For all skin colours, go for a plum red shade. It has a combination of both cool and warm base so it will suit everyone.
For pale Asian skin (like myself during winter), go for an orange base or coral coloured red.
For tanner Asian skin (also like myself during spring or summer), go for a blue base red (hint: fuschia).
For most Caucasian skin (very fair to fair skin with a natural or pink undertone), I would recommend most colours except for the ones that are too-orange.
For olive skin (natural or yellow undertone), try Shiseido lipsticks before any brands because I find them to be better for coloured skintones.

Under the red radar
Under the red radar by nina-yap featuring red makeup

Till next time, please comment below on ways you defy your natural beauty with red! :) x